
A new roof does not mean a maintenance-free roof. Even a professionally installed system can develop issues from settling materials, storm exposure, or small installation oversights that only become visible under close review.
A new roof inspection is a professional evaluation of your recently installed roofing system that verifies workmanship, confirms flashing and ventilation are correct, and documents the roof’s condition for warranty and insurance purposes. Most roofing professionals recommend an inspection shortly after installation and then annually, with additional checks after severe weather.
Below, you’ll find what inspectors actually examine on the exterior, interior, and in the attic, how often to schedule these visits, and how inspection findings translate into practical maintenance and repair planning for your property.
Key Takeaways
- A new roof still needs periodic inspections to confirm quality and protect warranty coverage.
- Professional inspections review shingles, flashing, ventilation, attic conditions, and interior signs of moisture.
- Inspection reports give homeowners and property owners a clear basis for scheduling repairs and budgeting maintenance.
What A Professional Roof Inspection Covers
A complete inspection looks at three connected areas: the roof surface and how water leaves it, every point where something interrupts the roof plane, and the interior spaces where leaks first show up. Each area produces documented findings — photos, measurements, and notes on material condition — that form the basis of any repair or replacement recommendation.
Exterior Surface And Drainage Assessment
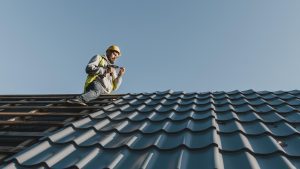
The inspector walks the roof when it’s safe to do so, examining shingles, tiles, or membrane section by section.
Common findings include missing or broken shingles, curling and cupping at the edges, blistering, granule loss that exposes the asphalt mat, and cracked or slipped tiles. On low-slope roofs, the focus shifts to seam separation, ponding water, and punctures in the membrane.
Drainage gets equal attention. Gutters are checked for debris, sagging, separated joints, and improper pitch; downspouts are verified to discharge away from the foundation.
Valleys and roof-to-roof transitions carry the highest water volume, so inspectors look closely for worn material, debris dams, and staining that indicates water is backing up rather than draining.
Flashing, Penetrations, And Edge Details
Most leaks begin at penetrations rather than in the open field of the roof. That’s why this portion of the inspection is often the most detailed.
Items examined typically include:
| Component | What’s Checked |
|---|---|
| Chimney flashing | Rust, separated counterflashing, failed mortar joints |
| Plumbing vent boots | Cracked or dried-out rubber collars, loose fasteners |
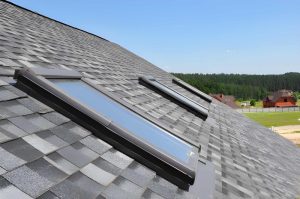
| Skylights | Curb flashing condition, deteriorated seals, glazing cracks |
| Pipe and HVAC curbs | Sealant failure, gaps at the base, unsupported units |
| Drip edge and rakes | Missing sections, corrosion, poor fit to fascia |
| Sidewall/step flashing | Improper overlap, exposed nails, caulk used as a substitute |
Inspectors also note exposed fasteners and any sealant applied over an underlying problem — a common sign of a prior temporary repair.
Interior Moisture And Structural Warning Signs
The attic often reveals problems that aren’t visible from outside. Inspectors look for daylight through the deck, water stains on rafters and sheathing, rusted nail tips, and dark streaking that points to condensation rather than an active leak.
Insulation is checked for compression, displacement, and moisture, since wet insulation loses R-value and holds water against the framing.
Ventilation is verified next: blocked soffit vents, disconnected bath fans venting into the attic, and inadequate ridge or gable exhaust all shorten roof life.
Structurally, the inspector notes sagging ridgelines, deflection between rafters, delaminated plywood, and any signs of past repairs.
Inside the living space, ceiling stains, peeling paint near exterior walls, and stains around fireplace chases are documented and traced back to a probable entry point on the roof.
Planning Maintenance And Repair Decisions
An inspection report is only useful when it feeds into a schedule, a paper trail, and a decision about timing. The findings from your first inspection establish a baseline that every future visit measures against.
Recommended Inspection Timing
New roofs should be inspected within the first year of installation, then on a twice-yearly cycle. In California, that generally means late fall before the winter rain season and spring after storms have passed.
Additional inspections are warranted after specific events:
| Trigger | Reason to Inspect |
|---|---|
| Windstorm over 50 mph | Lifted shingles, displaced tiles, loosened flashing |
| Hail or heavy debris | Granule loss, cracked tile, punctures |
| Nearby tree work or removal | Impact damage, scraped surfaces |
| New rooftop equipment (HVAC, solar) | Penetration seals, foot traffic damage |
| Interior stains or musty odors | Active leak tracing |
Tile and metal systems tolerate longer intervals between detailed inspections than asphalt shingle. Low-slope commercial membranes generally need quarterly checks of drains and seams.
Documentation For Owners, Insurers, And Warranties
Keep a dedicated roof file. Manufacturer material warranties and contractor workmanship warranties often require documented maintenance, and gaps in that record can weaken a claim.
Your file should contain:
- The original installation contract, permit, and final invoice
- Manufacturer warranty certificate with registration confirmation
- Every inspection report, with dated photographs of the same reference points
- Receipts for repairs, sealant work, and gutter cleaning
- Notes on any rooftop equipment added after installation
Insurers use this record to distinguish sudden storm damage from long-term wear, which is usually excluded from coverage. Consistent before-and-after photos make that distinction much easier to establish.
When To Schedule Repairs Or Replacement
Address minor issues in the same season they are identified. Sealant separation at a pipe boot, a single cracked tile, or a loose ridge cap costs little to fix and prevents water intrusion into decking and insulation.
Prioritize by risk rather than convenience:
- Immediate — active leaks, exposed decking, detached flashing
- Within 30–90 days — deteriorated sealant, clogged drains, minor punctures
- Next budget cycle — cosmetic wear, isolated granule loss
Replacement discussions belong in the conversation when repair costs approach a meaningful share of a new system, when damage covers a wide area rather than isolated spots, or when the roof nears the end of its rated service life. On a new roof, defects found early are usually warranty matters, so contact the installing contractor before authorizing independent repairs.